- You can manage Listing Alerts in a few different ways.
- Hover over 'Engage' and select Listing Alerts.
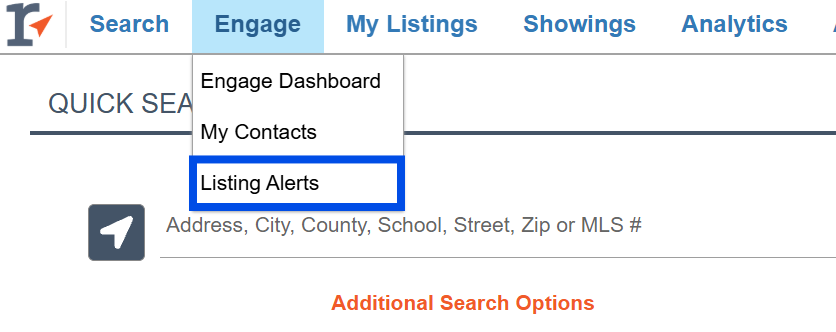
- Hover over 'Engage' and select Listing Alerts.
-
- -OR- If you are using your Dashboard Widgets, the Listing Alerts widget has a quick link: Click 'go to my Listing Alerts'.

- -OR- If you are using your Dashboard Widgets, the Listing Alerts widget has a quick link: Click 'go to my Listing Alerts'.
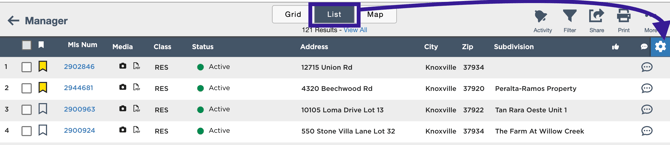
- Either will take you here to the Listing Alerts manager.

- A blue number in the 'New' column, indicates new activity since you last looked at that specific Listing Alert. The 'Last Updated' column tells you how long ago the latest listings were sent. To see those new listings that were sent to your client, click the number.

- Here you can see the new results via the Grid/List/Map, as well as all the past listings by clicking 'View All'.
- A blue number in the 'New' column, indicates new activity since you last looked at that specific Listing Alert. The 'Last Updated' column tells you how long ago the latest listings were sent. To see those new listings that were sent to your client, click the number.

- Utilize the tools to the right to help filter and share listings.
-
- Filter the Results (All/New/Selected/Bookmarked/Liked/ Disliked/Off Market)
- Share (Email to AN Client/Email to a different Client or share link)
- Print (Variety of print options)
- More ... (Edit Search/Edits Settings/CMA/Stats/Download Results/3rd Party Products/Remove all Listings)

-
- On each listing, you will see a bookmark icon. You can select the bookmark icon to note listings of interest for you. The bookmark is only visible on the agent side. Your client will not see it on the listing.

- On each listing, you will see a bookmark icon. You can select the bookmark icon to note listings of interest for you. The bookmark is only visible on the agent side. Your client will not see it on the listing.
-
- From the 'List' view:
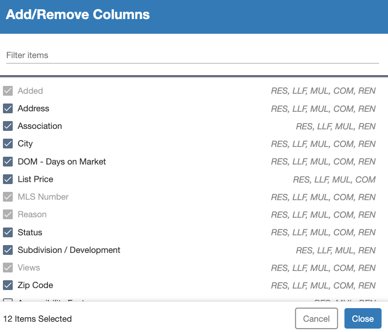
- Quickly add/remove columns using the settings gear button
- Click+drag columns to reorganize layout dynamically
- Contacts/Clients see the layout you set up
- Layout changes are auto-saved and unique to each Listing Alert
- From the 'List' view:
To return to the Listing Alerts select 'Manager' on the left.

- To view all past results in a Listing Alert, click on the Search Name.

-
- Rather than scrolling, you can type in a Contact, Description and Email into the search box in the top left corner.

- Rather than scrolling, you can type in a Contact, Description and Email into the search box in the top left corner.
- To view any feedback your client has left, look at the "Feedback" column.
- If the Listing Alert does not have a contact, it will show "n/a"
- If the Listing Alert has contacts, but no one has left feedback, it will show "None"
- If the Listing Alert does feedback, but the agent has already looked at it, it will show "View". This allow the agent to quickly access the feedback, even if they have already seen it.
- If the Listing Alert has unread feedback, it show a blue "Bell" icon

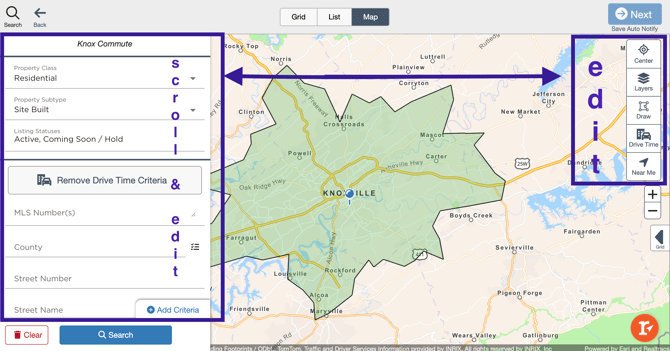
- To edit the Search Criteria for a Listing Alert use the Edit Column and click on the Magnifying Glass.

- Enter any Common Criteria and Additional Criteria that may apply to the edit. You can also edit using the center tool on the map, draw a specific area or shape on the map, add layers, drive time or even do a Near Me search and/or combine any of these to Edit the search. Then click search.
**REMEMBER** Unless searching a specific MLS #/s, all searches require you to enter a location type, i.e., County, City, Zip Code, or Using the Map Location.
-
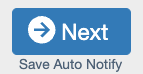
- To save the newly edited criteria to the Listing Alert, select the Next button.
-
- You can make note of the edit for yourself, or your client, or you can click Save.
- You can make note of the edit for yourself, or your client, or you can click Save.
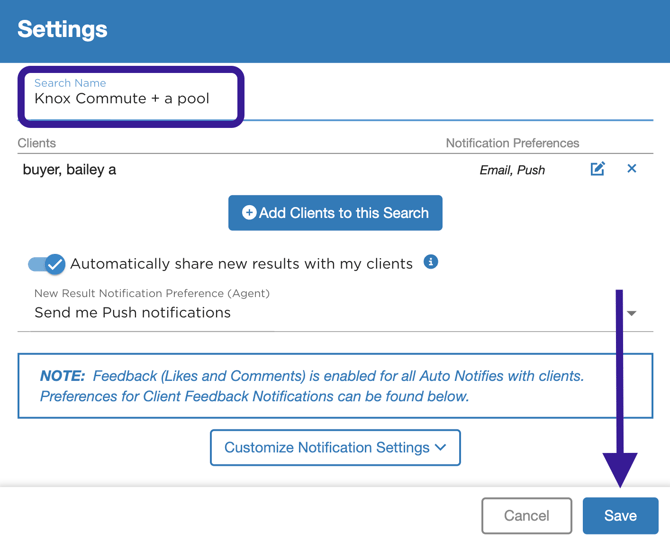
- To change any Listing Alert settings such as notification preferences, email addresses, adding another contact etc, click the Gear icon in the Settings column.

-
- Make the appropriate changes and then save.
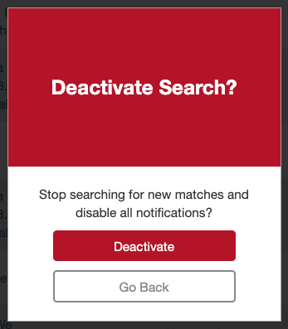
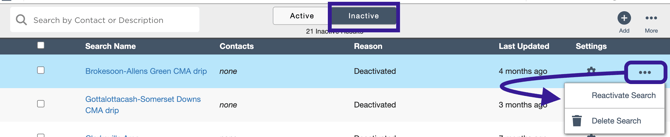
- You can also Deactivate a Listing Alert Search by selecting the More icon (...) and then clicking Deactivate Search. To see all Inactive Listing Alerts select the Inactive button.

- To re-activate a Listing Alert, click on the 'Inactive' tab, then, click the More icon (...) and then select Reactivate Search.

📢 Still Need Assistance? Contact our Support Team!
💬 Chat with us! Click the chat bubble at the top right.
🕗 Mon - Fri: 7am - 6pm CST Sat: 9am - 4pm CST
✉️ support@realtracs.com 📞 p: 615-385-0777