Cloud CMA-CMA
THE CLOUD CMA TOOL CMA STEPS
Realtracs provides you with multiple 3rd Party Tools right from our MLS platform. Due to Realtracs' integration with said tools, a single sign-on provides seamless access to all of them, including Cloud CMA!
 The Cloud CMA is a 3rd Party Online report generating tool that Realtracs has provided for you. This tool allows you to create an in depth CMA, innovative Buyer Tour, one page Flyer's and expanded, eye catching Property Reports.
What is a CMA? A Comparative Market Analysis is a side-by-side comparison of homes for sale and homes that have recently sold in the same neighborhood and price range. The purpose is to show estimated market value, based on what other buyers and sellers have determined through past sales, pending sales and homes recently put on the market.
To learn how to search in Realtracs to find comps, click HERE
TRAINING VIDEOS:
Click Cloud CMA Training Videos
- Select the listings you wish to use for your CMA. Navigate to the 3 dot menu and select 'Cloud CMA'.

- If this is your first time using the Cloud CMA Product, you will need to activate your account and launch it. Fill in your first and last name, and email, then, check the box that you have read & agree with the terms of service. Then click the Activate button.
 On the next screen select Cloud CMA Launch. Then, close completely out of the Cloud CMA product.
- Once in the Cloud CMA Tool, complete the following steps:
- Name the report, and add the address (use the address the auto populates in the drop down.)
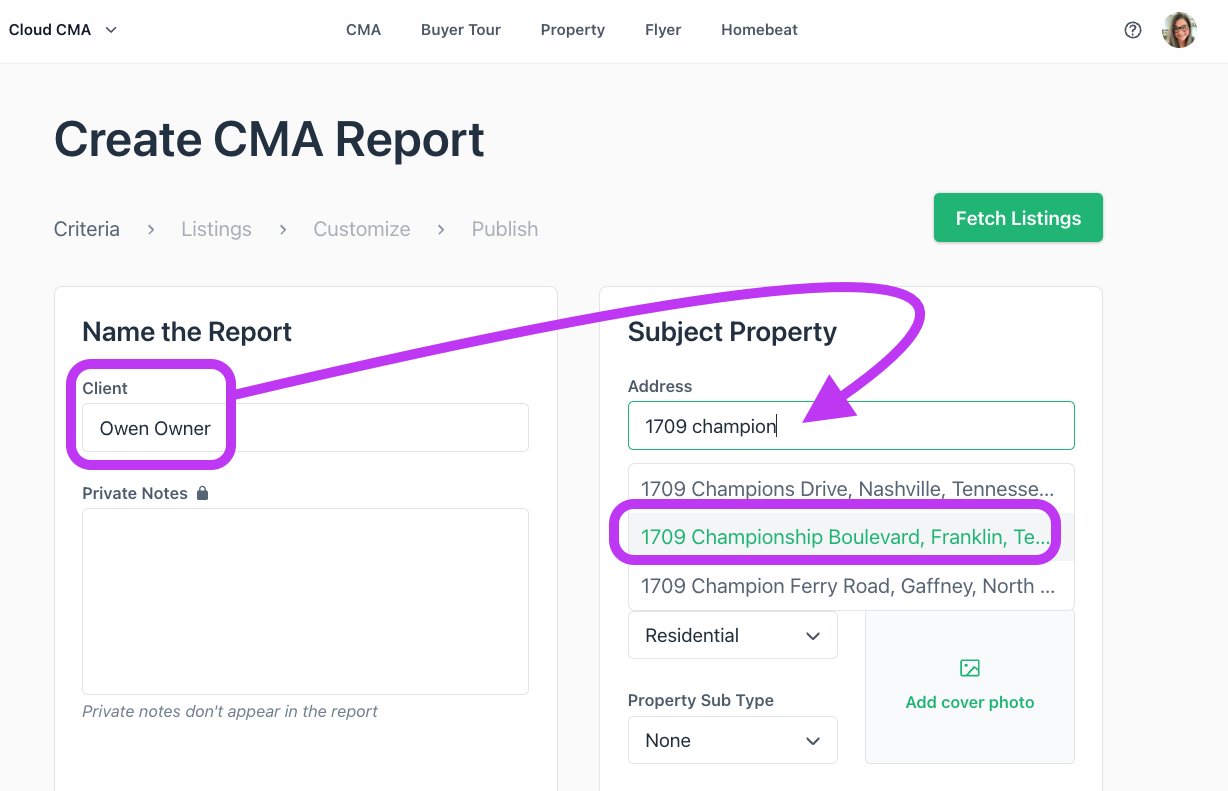
- Enter Square Feet, # of Beds & Baths, and add a photo of the Subject Property.

- Select the green button 'Fetch Listings'

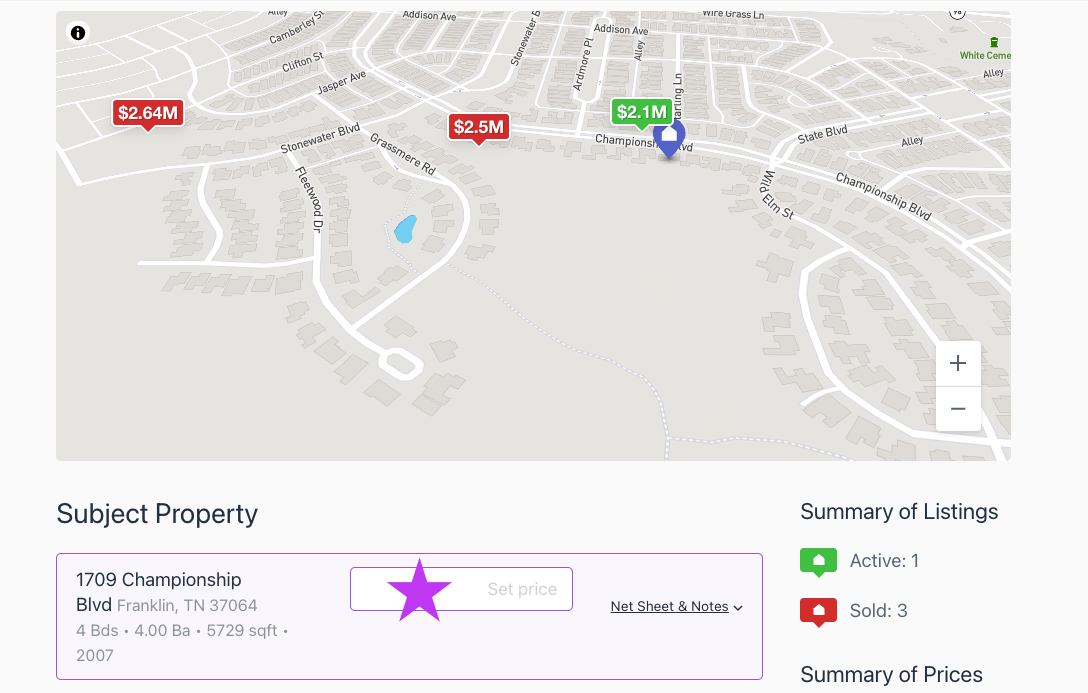
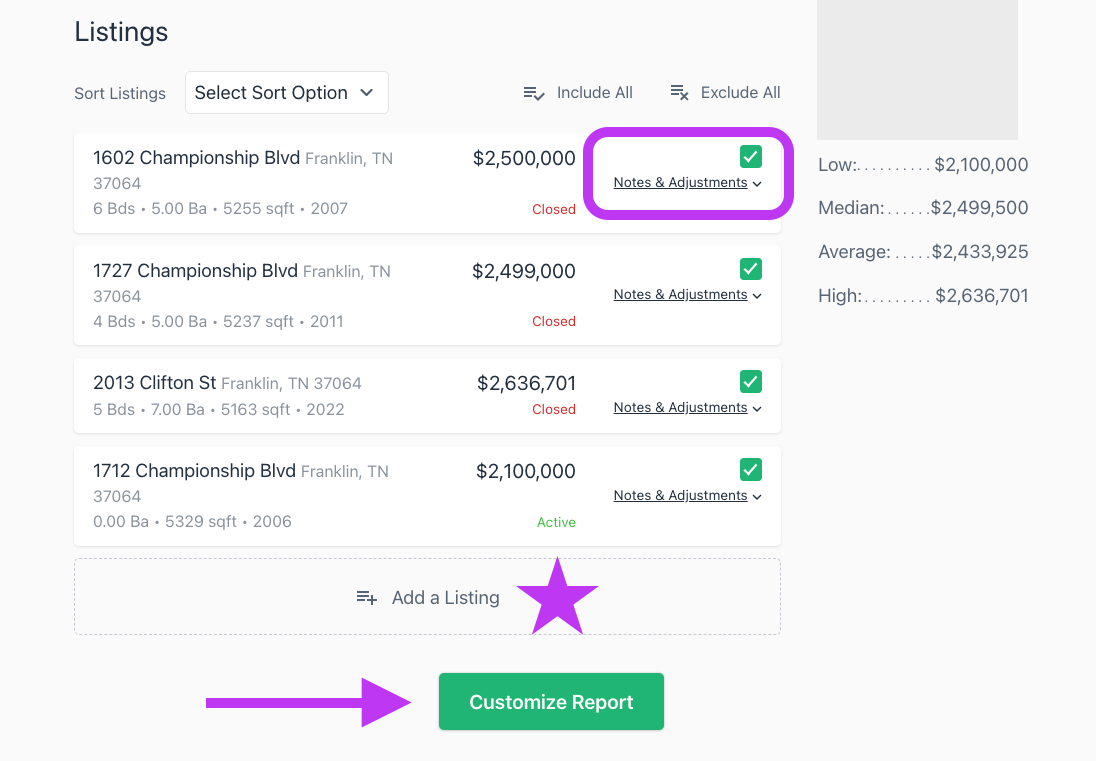
- Scroll down on the Organize Listings page to set a price point, re-organize the order of the comparable listings, exclude some listings, add new listings, change the details in the remarks and even add adjustments if needed. Then select the green button 'Customize Report'

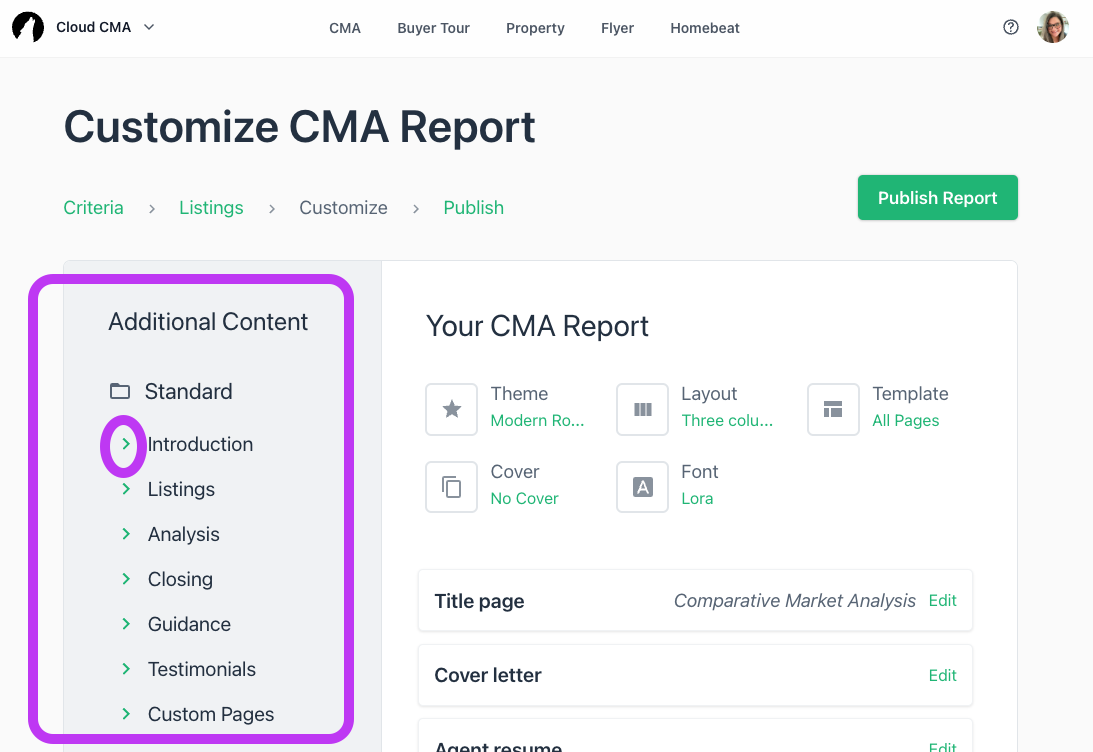
- Add a Theme, Layout, and Font. Even create Templates.

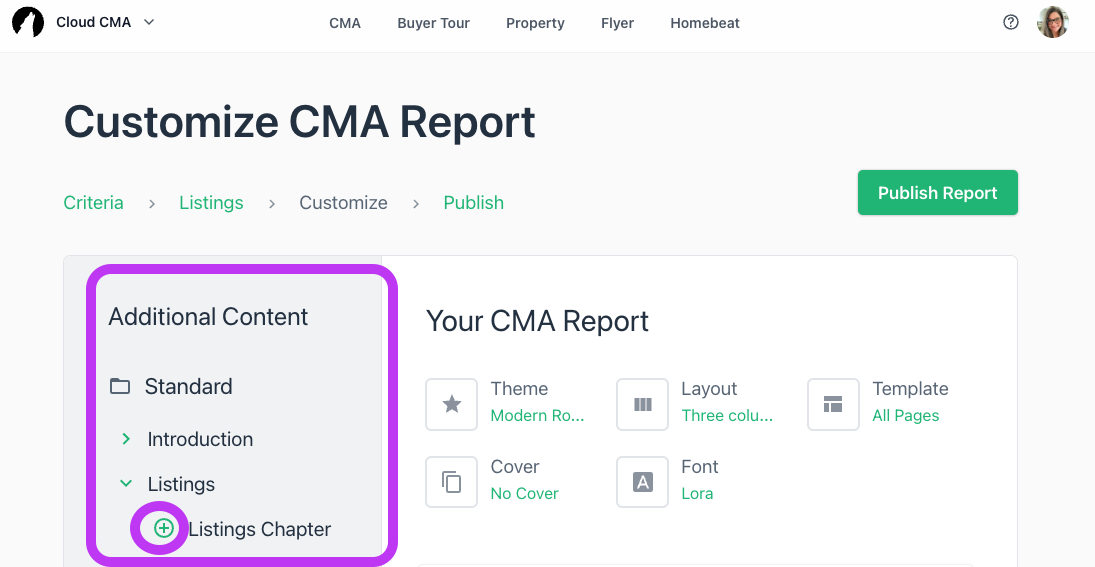
- On the left, you can add additional content to the report, select the little green arrow, and then the green plus icon to add the content to your report.
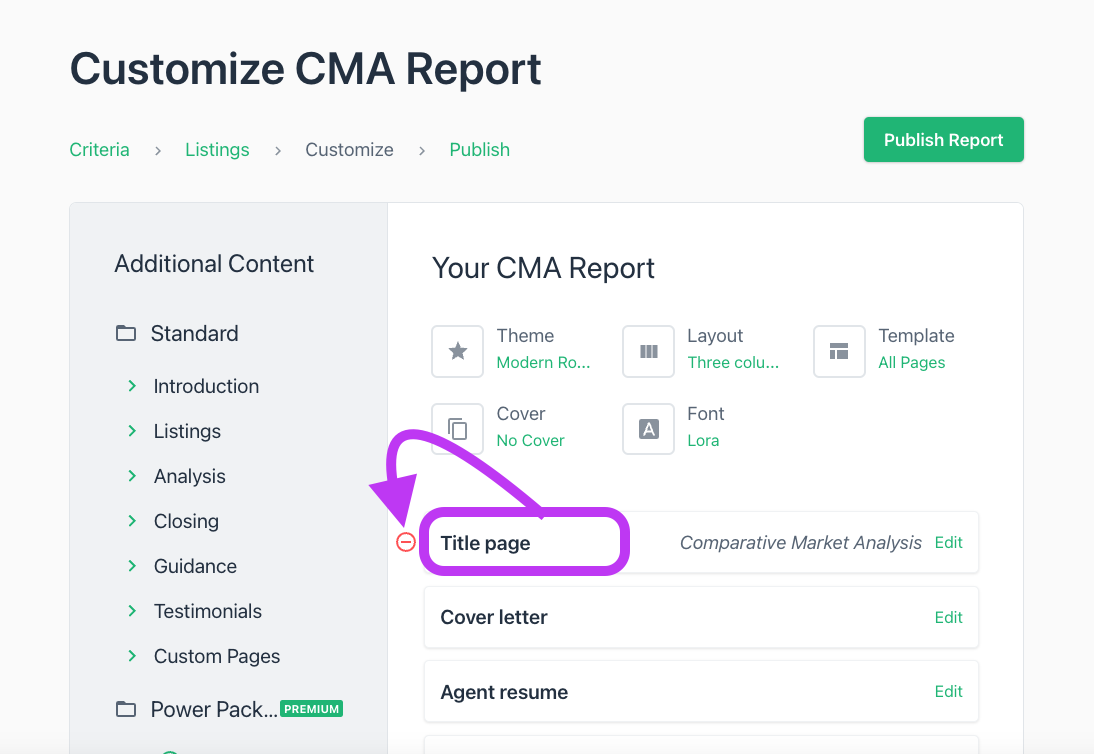
- To view any page in the report, simply hover over the name of the page and click it. To remove a page, click the red minus sign.
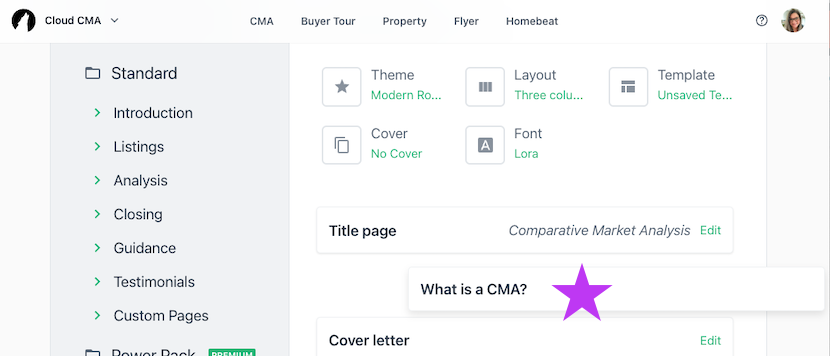
- To re-arrange the order of the pages, hover over the block and click and drag.
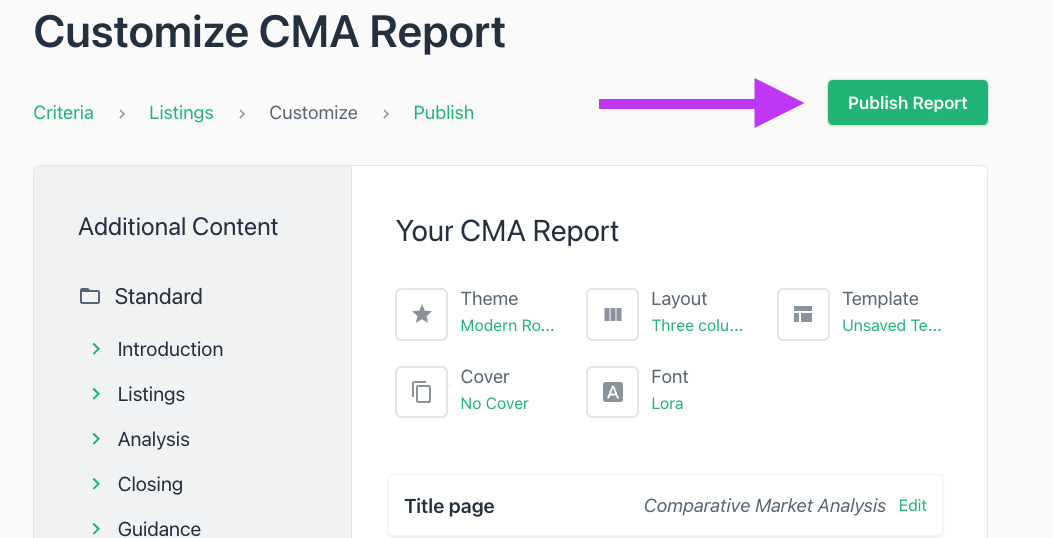
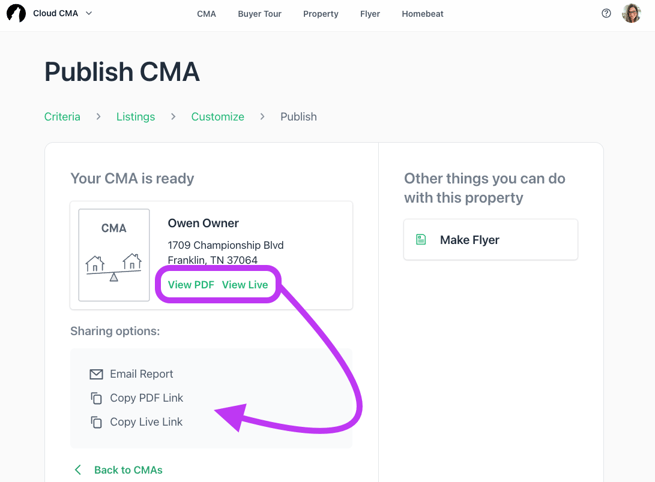
- Once you have the CMA you want, you're ready to Publish. Select the green "Publish" button.
- Once Published, you can view the report in PDF format, view Live, Email it directly from the Cloud CMA tool or Copy the PDF and or Live links to share via your personal email account.
- You can customize your Cloud CMA settings. In the top right corner of Cloud CMA, select the gray silhouette .

- To add your photo, your company logo, your Agent/Contact information, add a Password, click Account Settings. You can also add Custom Pages and use the Lead Generation tool for free. To see short "how to" videos by Cloud CMA, select Learning Resources.

📢 Still Need Assistance? Contact our Support Team!
💬 Chat with us! Click the chat bubble at the top right.
🕗 Mon - Fri: 7am - 6pm CST Sat: 9am - 4pm CST
✉️ support@realtracs.com 📞 p: 615-385-0777